School Schedule Setup for Attendance purposes
School Schedule Setup - National
Each school should have a track (year) that originated from the Student Information System (SIS) during the integration process. If not, re-run the SIS integration. If the track still isn’t appearing, contact StudentsAchieve’s support desk for assistance.
If you are using the gradebook, lesson planner or parent/student portals, you need to set up the minimum setup requirements for each school – see below.
If you are planning on using the StudentsAchieve Attendance System as well, you must setup the StudentsAchieve school schedule exactly like the school schedule in the SIS
Minimum Setup Requirement – Must be the same as the SIS
Start and end dates for the school year.
- Start and end dates for the terms or semesters.
- Start and end dates for the reporting periods.
- A general cycle day, a general bell schedule with general bell periods.
- A basic school calendar.
Optional Setup Requirement
- Cycles, days and the bell periods for each day.
- Early dismissal days or half days and how they cycle through the school’s calendar.
Creating a School Schedule
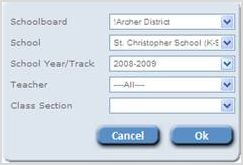
1. In the picklists, select your Schoolboard, School and Track.
2. Go here: Manage > Setup > School Schedule.
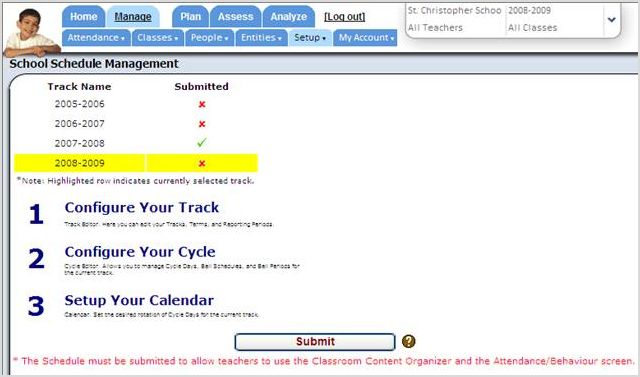
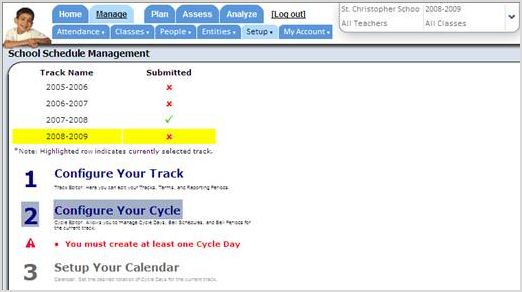
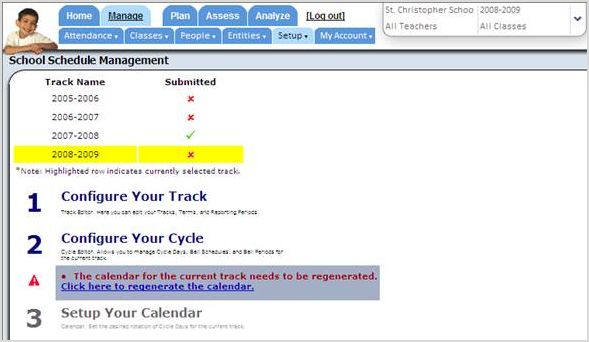
3. The School Schedule Management screen will open. The track you have selected will be highlighted in yellow. Click Configure Your Track.
Updating Track Information
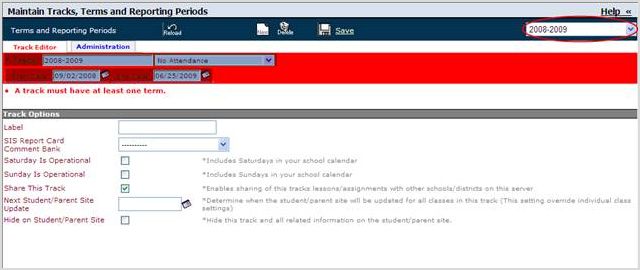
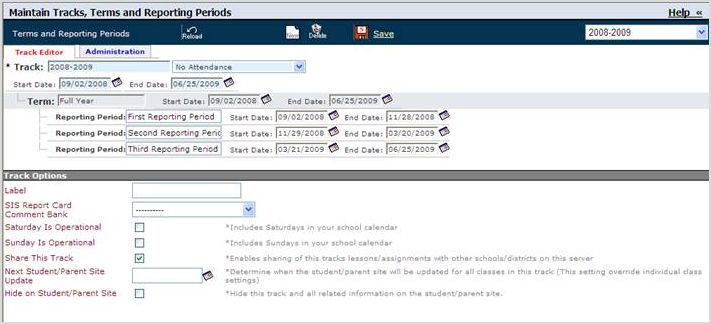
A new screen will open: Maintain Tracks, Terms and Reporting Periods.
1. Review the Track information to ensure the attendance type; and start and end dates of the track (year) are correct and correspond with the dates and names in your school SIS.
- If you are not using StudentsAchieve’s Attendance System, make sure you have No Attendance selected.
- You can change tracks within a school by using the picklist.
Each track needs at least one term and one reporting period within the term. A term could be a full year or a semester; this will depend on what type of school you are setting up.
- For most Elementary and Junior/Middle Years schools, you typically have one term called Full Year and three or four reporting periods within the one term.
- For most High/Senior/Secondary schools, you typically have two terms, called Semester 1 and Semester 2, with two reporting periods within each term/semester.
Adding a Term
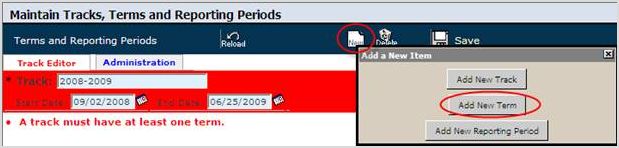
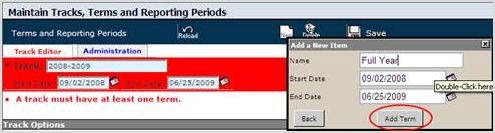
1. To add a term, click New and then click Add New Term.
2. Name your term and set the start and end dates. By default, the system will use the start and end dates of the track. You can change the dates by clicking the calendar icons. Once you’re done, click Add Term.
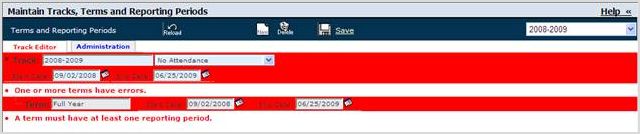
Here’s an Elementary school example - using one 1 term called Full Year.
When you have added the Full Year term, it should look similar to the one below. Notice that the start and end dates of the track and full year term are the same.
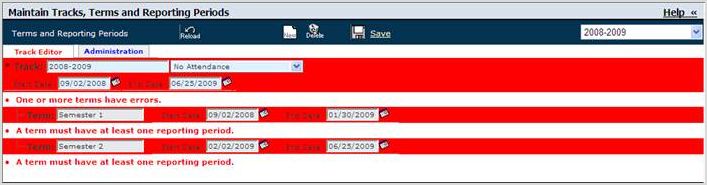
Here’s a Secondary school example - Using two terms, Semester 1 and Semester 2. Notice we changed the start and end date to match the semesters start and end dates in the SIS.
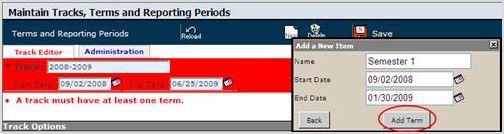
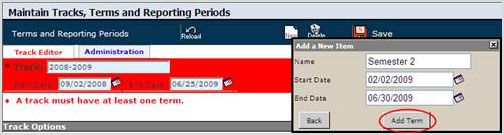
When you have added both terms (semesters), it should look similar to the one below:
Adding a Reporting Period
As mentioned above, each track needs at least one term and one reporting period within the term.
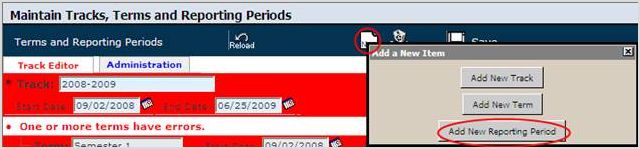
1. Click New again and then click Add New Reporting Period.
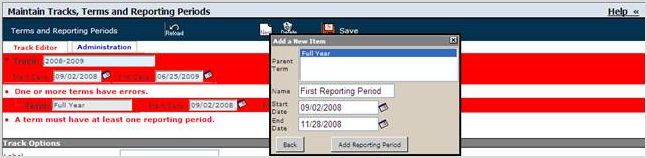
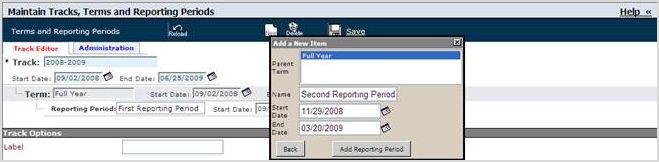
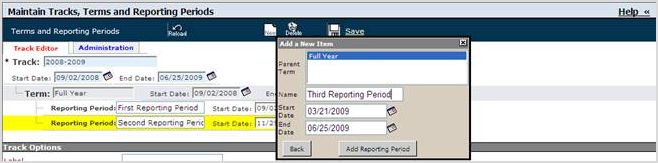
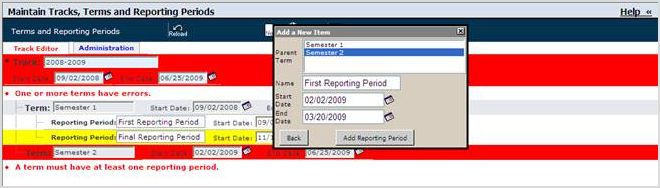
2. Highlight the Parent Term that you want to work in; name your reporting period (report card period) and set the start and end dates for the reporting period. Then click Add Reporting Period.
Continue to add your reporting periods to each term. If dates overlap; a warning is issued.
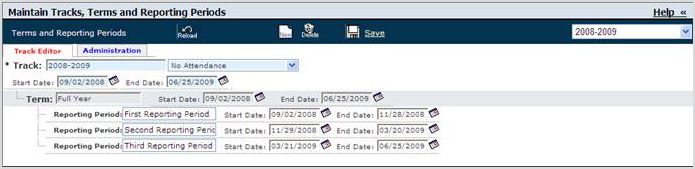
Here’s the Elementary school example from above - using one term called Full Year and three reporting periods (report cards) in the term (Full Year).
Note: We’ve changed the start and end date to match the reporting periods start and end dates in the SIS.
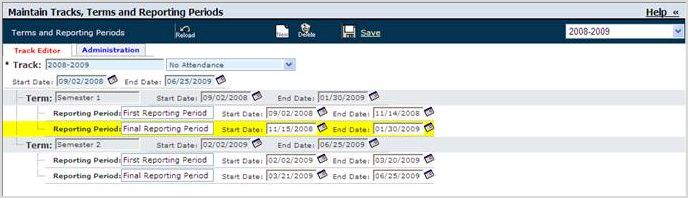
When your term and reporting periods have been added the screen will no longer be red and should look similar to the screen shot below.
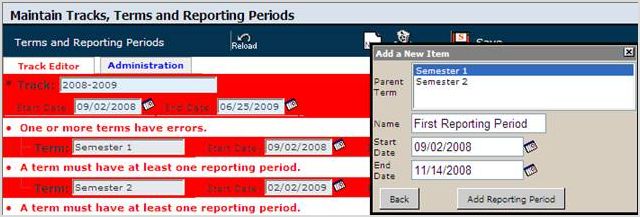
Here’s the Secondary school example from above - using two terms, Semester 1 and Semester 2; and two reporting periods (report cards) in each term (semester).
Note: We've changed the start and end date to match the reporting periods start and end dates in the SIS.
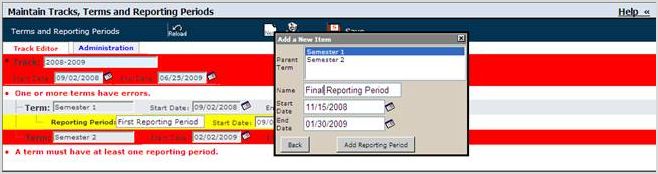
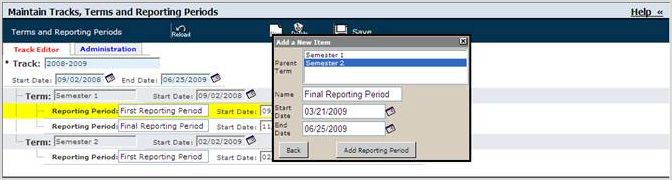
When all of your terms and reporting periods have been added, the screen will no longer be red and should look similar to the screen shot below.
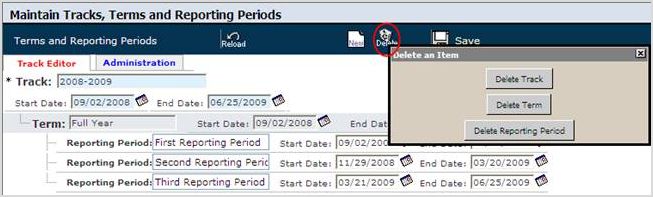
Deleting a Term or Reporting Period
1. If you need to delete a term or reporting periods during this process, click Delete and go through the steps provided.
Track Options
- You may have noticed, on the Maintain Tracks, Terms and Reporting Periods screen, you have Track Options.
- Label – You can give your track a different name.
- SIS Report Card Comment Bank – You may have the option to bring in the report card comment bank from your SIS through integration.
- Saturday and Sunday is Operational – You can include or exclude Saturdays and Sundays from your school’s calendar. By default, they are excluded.
- Share This Track – Allows you to share this track with other school boards or schools on this server.
- Next Student/Parent Site Update – Allows you to delay the student/parent portals from updating. This will overwrite any teacher’s individual class settings.
- Hide on Student/Parent Site – Allows you to hide this track from the student/parent portal. This is a good feature when you would like to hide previous years (tracks) from the portals.
Once you have reviewed the information you have entered and it matches your school schedule in the SIS, click Save and close the window.
Configuring Your Cycle
The next step is to configure your cycle days, bell schedule(s) and bell periods for each bell schedule.
Tip: If you are not using StudentsAchieve’s Attendance System, you can create one general cycle day, one general bell schedule with general bell periods. This will save you time.
1. Click Configure Your Cycle.
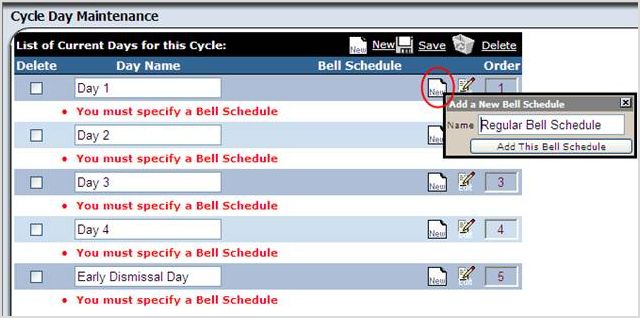
This will open a new screen: Cycle Day Maintenance.
If this is your first year in StudentsAchieve, you will need to create your school’s timetable days.
2. Click New and enter the name of your cycle day and sort order. Click Add This Cycle Day.

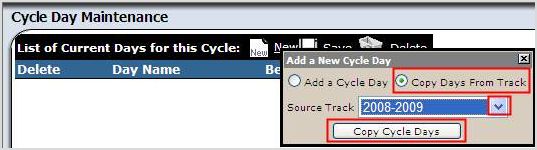
After the first year, you can copy your cycle days from a previous year’s track.
Click Days From Track, select the track from the picklist, then click Copy Cycle Days.
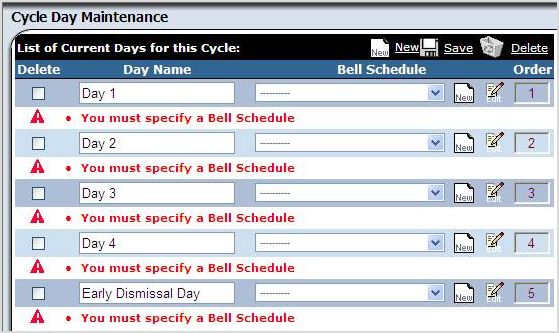
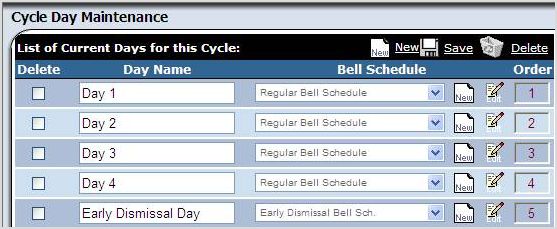
When you have added all your cycle days, your screen should look similar to this:
Bell Schedules
Each cycle day needs a bell schedule associated with it and the bell periods for that bell schedule set up.
In this example, we are going to have two bell schedules:
- Regular Bell Schedule
- Early Dismissal Bell Schedule
1. Beside your first cycle day click New, at right.
2. Enter the name of your bell schedule and click Add This Bell Schedule.
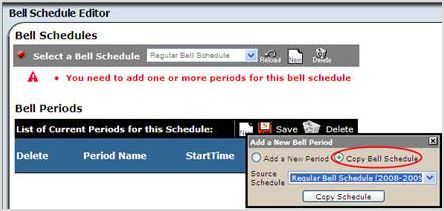
The Bell Schedule Editor window opens. Ensure the correct bell schedule name is displayed in the grey top bar.
3. In the black Bell Periods bar, click New.
4. Enter the name of the period, the start and end times and check the attendance box, if it applies. Ensure that the times entered are the same as times entered in your SIS.
5. Click Add This Bell Period.
6. Continue to add your bell periods. When you are done click Save.

After the first year, and if the bell schedule hasn’t changed, you can copy your bell schedule from another year’s track.
Your bell schedule should look similar to this. At this point you can make any changes; delete a period, change a name or select/deselect it as an attendance period.
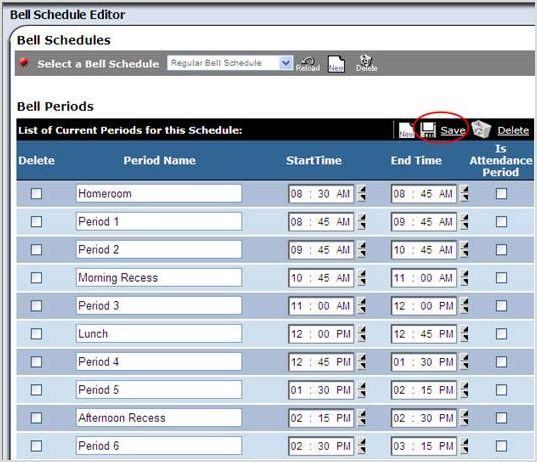
7. Click Save when done.
8. To add a new Bell Schedule for a special day in your schedule, click New, on the top grey Bell Schedules bar again; and go thru the same process.

9. Once all the Bell Schedules are added, click Reload and close the window.
You should be back on the Cycle Day Maintenance screen.
10. You can now align one of your bell schedules with each cycle day by using the picklist.
11. Click Save when finished.
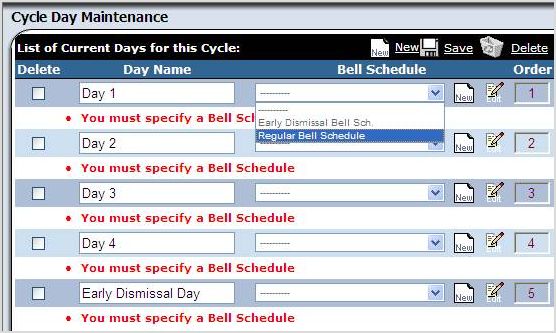
Your Cycle Day Maintenance screen should look similar to the one below. Close the window, which will bring you back to the School Schedule Management screen.
Set up Your School’s Calendar
You should be on the School Schedule Management screen.
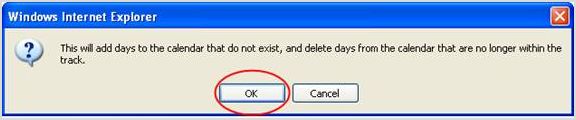
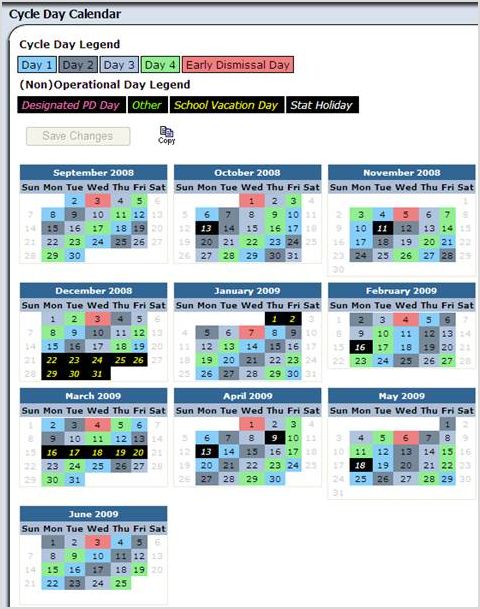
1. Click Click here to regenerate the calendar hypertext to open the Cycle Day Calendar screen.
2. Click Regenerate and click OK to access the next message. You are simply adding your new cycle days into the legend.

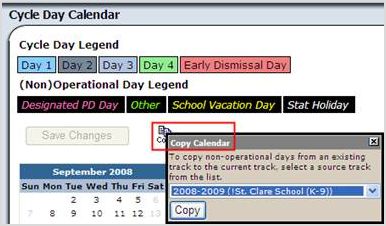
The Calendar will open; notice your cycle days appear in the legend:
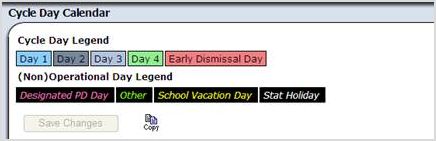
3. If you wish to copy holidays (non-operational days) from another track, use the copy feature.
Depending on how your cycle days work, you may want to apply all of the non-operational days to the calendar first and then cycle the school days through or vice versa.
In this example, we will set the non-operational days first and then the school cycle days.
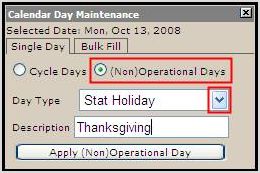
1. Click on a date in the calendar, a Calendar Day Maintenance screen will open.
2. Select the (Non) Operational Days radio button.
3. Select the Day Type from the picklist. Add a description (optional) and click Apply (Non) Operation Day.
4. Go through the calendar and add all the non operational days. Click Save Changes when prompted.
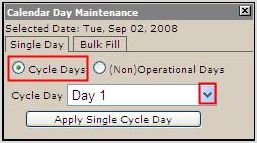
5. To apply a single school day, select the first day of school, and click Cycle Days.
6. Choose the Cycle Day from the picklist.
7. Then click Apply Single Cycle Day.
If you want to apply multiple cycle days at once, use the Bulk Fill tab. You can rotate selected days, rotate a weekly pattern, or clear the calendar.
1. Click on the first day of school in the calendar. A Calendar Day Maintenance screen will open.
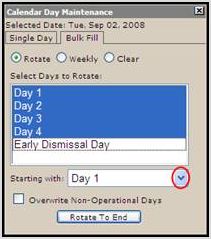
2. Click the Bulk Fill tab.
3. Select the cycle days you want to bulk fill for the school year.
4. Select the cycle day at which you want to start.
5. Decide if you are over-writing non-operation days.
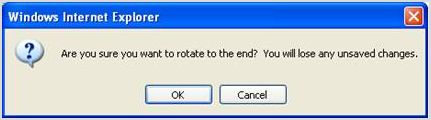
6. Click Rotate to End. You'll get the following message. Click OK.
8. Once your calendar has been generated, you can apply a single school day by clicking on the date. For example, you could do this for your Early Dismissal days.
9. Once complete, click Save Changes and close the screen.
10. The final step is to Submit the schedule, which allows teachers to use their classes and take attendance.