TWebATT: Basics of Taking Attendance for Teachers
TWebATT 5.30.00 and newer
Overview
Trillium Web Attendance (TWebATT) is part of the Trillium suite of products, which allows teachers to enter student Attendance via the Internet at any place or time. All Web Attendance information is directly accessed in the Trillium database from the application, with no interim steps of data processing. This article explains the basics of how to take Attendance.
Application Access
Your school's IT staff provides teachers with an Internet site link and assigns security credentials. You must enter your username and password in the correct fields. TWebATT then retrieves the security setting and gives access to all students and classes you're affiliated with. Our application verifies you have permission to access information and perform certain tasks. Core Trillium is responsible for maintaining the security accounts of teachers enabled to use our Web applications. We use encryption to ensure confidential textual information is securely transmitted over the internet.
Note: After several unsuccessful login attempts during one session, your account will automatically be suspended for a certain amount of time. If that happens to you, speak with your IT staff. Your tech staff can configure both number of attempts and the length of the suspension.
Accessing TWebATT from Core Trillium
Since Core Trillium 3.05.00, any user assigned the proper Security Task has been able to access TWebATT from within Core Trillium. You don't need to enter your credentials again to log into TWebATT.
Note: If your tech staff set Preferences to require changing of passwords, that enforcement occurs when you log into Core Trillium.
Attendance Page
It's also possible your tech staff gave you the URL of TWebATT and you're entering our web application directly; without going through Core Trillium. Either way, the first page loaded when you enter TWebATT is shown here. This is where you begin entering Class Attendance for students.
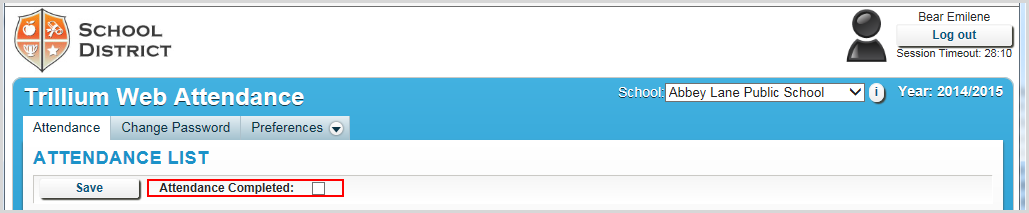
All the pages have:
- A School District logo in the top, left corner;
- User’s name, logout button and session timeout counter in the top, right corner.
- Within the colored border below that, you'll see your school name to the left of the current school year.
- If you have Classes at more than one school, you'll see a picklist listing those schools.
Search Criteria
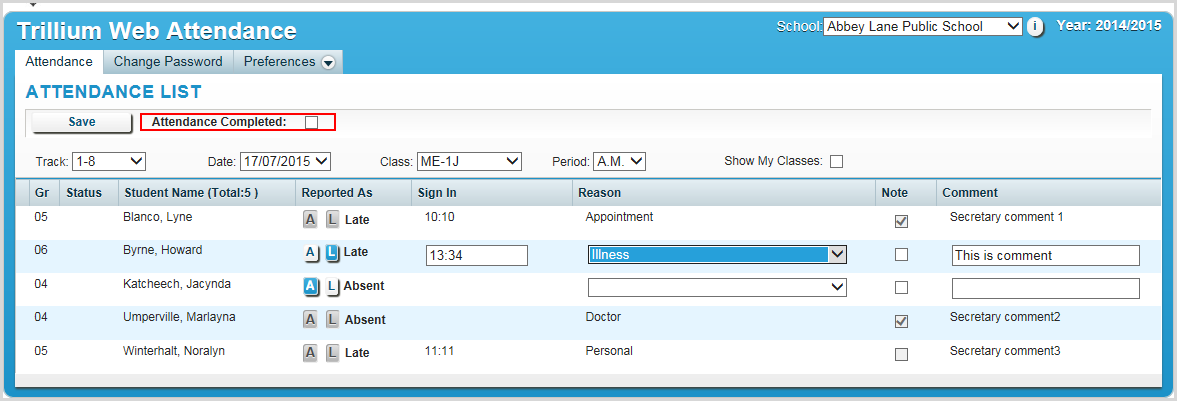
Begin by selecting the Class in which you wish to take Attendance, based on this search criteria: Track, Date, Class, Period, Show My Classes. When you enter our application, we load default values for all the criteria, perform a search and display the Student List for the default Class and Period.
If you have Classes at that time, the Class picklist will be populated with all Classes, and the Date picklist will be populated with all Attendance dates for the selected Class. If you don’t have any Classes at the time, the Class and Date picklists are empty. The Class picklist is populated by default with the Classes for which you're designated an Attendance Teacher, based on the Date selected. If the Class is not taught on the selected date, the Student List is empty.
When you select another Track from Track picklist, we perform a search of the default Class for the selected Track and re-load the Student List for the found Class.
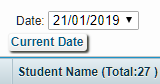
The Date picklist is populated with the Attendance-taking days from the School Calendar for the default Class. The Date field defaults to the current date if this date is an Attendance-taking day, otherwise it's set to the last previous Attendance-taking date. You may manually select any other Attendance-taking date. The Period picklist is populated based on the timeline for the Track, Class and date selected. Click Current Date to return to the current attendance day.
If you have All Students access, you can view all students in your school. Click Show My Classes to display only the classes for which you're designated an Attendance Teacher.
Student List
The list contains students’ data, based on the selected Class and Class Period. When we load the students, they default to being sorted by Student Name. Medical Peril column is visible if the corresponding board preference has been set.
- The column contains an icon if the student has a Medical Peril flag.
- The column does not have a title and is not sortable (cannot be used for sorting the Attendance list).
Status column displays P for preregistered students.
- You can sort this list by status: All preregistered students can be relocated at the top or bottom of the list.
- To sort by this column, click Status. The arrow in the title shows your sort direction.
Student Name displays students’ names in last name, first name.
- The column’s title displays the total number of students in the Class and the number of preregistered students (if any).
- Initially, your Attendance list is sorted by the value of this field in alphabetical ascending order.
- To change the direction of sorting (ascending to descending and back), click Student Name. The arrow in the title shows the sort direction.
- Each name has a tooltip displaying the number of Attendance records for each Attendance type: A, L, G, N, E. You see the same information by clicking a student’s name. We designed this for devices without tooltip abilities, such as iPads. We removed Absent and Late columns, which appeared in previous versions.
Reported As allows you to create Attendance records.
- ClickA to create an Absent record;
- Click L to create a Late record.
- If a student should not have Attendance records, both buttons should be left in passive (non-clicked) state.
- The selected Attendance Type is displayed beside the buttons.
- The Ontario Ministry of Education expanded the use of G-day codes for more Attendance records than in the past, beginning with School Year 2017-2018. Read more here.
If your secretary has already entered an Attendance record, the students' Reported As value is displayed, and both buttons are disabled. Additional fields, Sign In, Reason, Note, Comment, might become available when you click Report As, depending upon Board Preferences. Even if you can see those fields, if data was entered into them by someone else, such as your school secretary, you will not be able to edit them.
- You can sort the records in ascending or descending order by clicking the title of the column. The arrow in the title shows the sort direction.
The Reason column displays Attendance reason(s) for the selected Attendance Type (Report As).
- Teachers can modify the reason if the corresponding board preference has been set.
- Otherwise, you can only see the reasons entered by the secretary through other applications (Core Trillium or Admin Attendance).
- If the Reason field is editable, you can select from the list of Absent or Late reasons after you Click Report As.
- You can sort the records in alphabetic ascending or descending order by clicking the title of the column. The arrow in the title shows the sort direction.
The Comment column contains comments to Students' Attendance records.
- The column is visible only if the Allow teacher access to comments board property has been set to Yes.
- If the Read-only board preference has been set, teachers can see the comments set by a secretary with another application.
- If Enter/Modify comments property has been set, you have full access to his/her comments. Any comments entered by other users are still non-editable.
- Maximum length of the Comment field is 80 characters.
- You sort the records in alphabetic, ascending or descending order by clicking the title of the column. The arrow in the title shows the sort direction.
Ready to Save?
Click Save at the left side of the Attendance List header to save data entered into your database. When applied, this activates some or all of the pre-registered students (more on them below). Save has two possible tooltips:
- Attendance for the Class will be saved (if the Attendance Completed checkbox is not selected);
- Attendance for the Class will be saved and flagged as Completed (if the Attendance Completed checkbox is selected).
When you select the Attendance Completed checkbox, TWebAtt populates the Period Attendance Recording table for the current period. When Attendance is completed for all periods, then the Class Attendance Recording table is populated.
- A percent sign (%) will appear beside the Class Name in the Class picklist if Attendance has been completed for some (not all) of the Periods.
- An asterisk (*) will appear beside the Class Name to indicate Attendance has been completed for all Class Periods of the current date.
Attendance Completed control is surrounded by a red frame, as in the first screen shot under Attendance page, above, if not selected. When you Click Save, if there are no errors in entered Sign-In values, TWebATT saves the data and displays a status message at the top of your Attendance list. The saving status might be:
- Attendance data has been successfully saved
- There were problems in saving Attendance data or in students’ activation.
If there were errors in Sign-In times, nothing gets saved, and erroneous fields are marked.
Activating Pre-registered Students
If Display Preregistered Students board preference has been set, the pre-registered students are displayed with other students of the Class. In this case, if a pre-registered student does not have Attendance records (none of the "Report As" buttons is activated) or have a Late record, the student will be activated on saving data.
- If the Display warning that student status will change to Active preference has been set, we warn you about activation. If you Click No, we don't perform the save.
- If the Board Academic Preference, Allow transfer to multiple schools is on, we check if the student is PreReg in multiple schools for the same school year. If the student is not active in any other day school, we will update the student’s status to Active in the school taking Attendance.
- If the student is already active in another day school this message displays: "The following students: {Student(s) Names} 'Active' in another school and can’t be Active here."
- Students can't become active in a Shared School before they are Active in their Home School. If they're not active in their Home school, this message appears: "The following students: {Student(s) Names} not 'Active' at the home school and cannot be active here."
- If the student has already been activated by another user (i.e. the secretary) while the teacher is entering and saving the data, this message appears: "The following students have already become made active: {Student(s) Names}."
- If an activation error occurs, the control is returned to the Attendance page. All the Attendance records not affected by activation are saved. The status of the operation is "There were problems in saving Attendance data or in students’ activation."
More information on pre-registered students is available here.
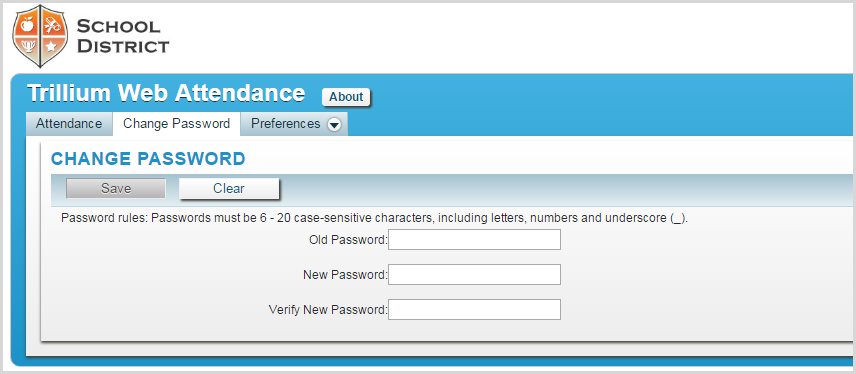
Change Password
You may change your personal password by completing the fields on the Change Password page. Your password rules display above Old Password on the page.
Preferences
- The Preferences menu tab provides access to the user and board current preferences and application settings.
- The Preferences menu tab and its sub-menu items are available only for users having proper security rights (security tasks).
- The tab opens three submenu items: User, Board Preferences and Configuration.
User Submenu
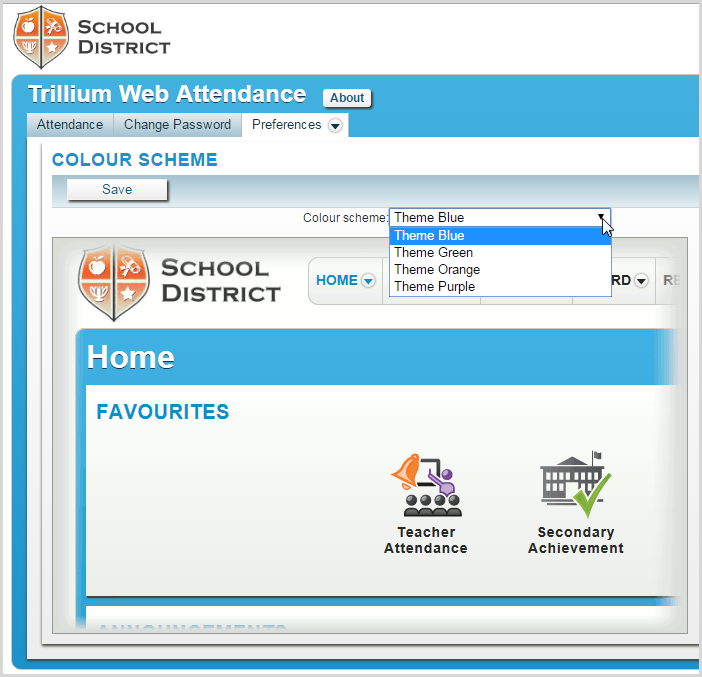
You may change your personal preferences by selecting a color scheme from the picklist. The choices are blue, green, orange, and default (purple).