
Class Sections Page
Students Achieve v. 6.5.0 and newer.
Overview
This article provides steps on how to use the Class Sections page to initialize classes, share and manage permissions for class sections in StudentsAchieve v6.5.0 and newer.
Navigation
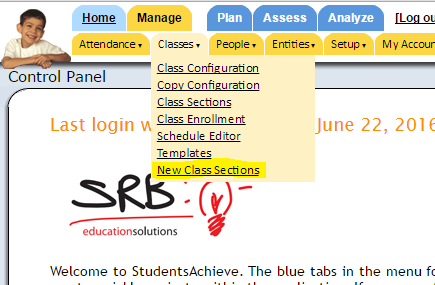
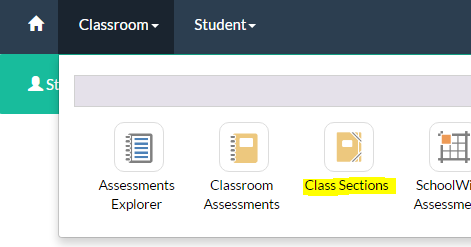
You can access the New Class Sections from: The main StudentsAchieve Shortcuts Menu, Top Menu Mar under Manage > Classes > New Class Sections or from the Via menu Classroom > Class Sections.
Shortcuts Menu | Top Menu Bar | Via Menu |
|---|---|---|
 |  |  |
Class Section Screen - Features and Use
Once you have navigated to the 'New' Class Sections screen you will see the following:
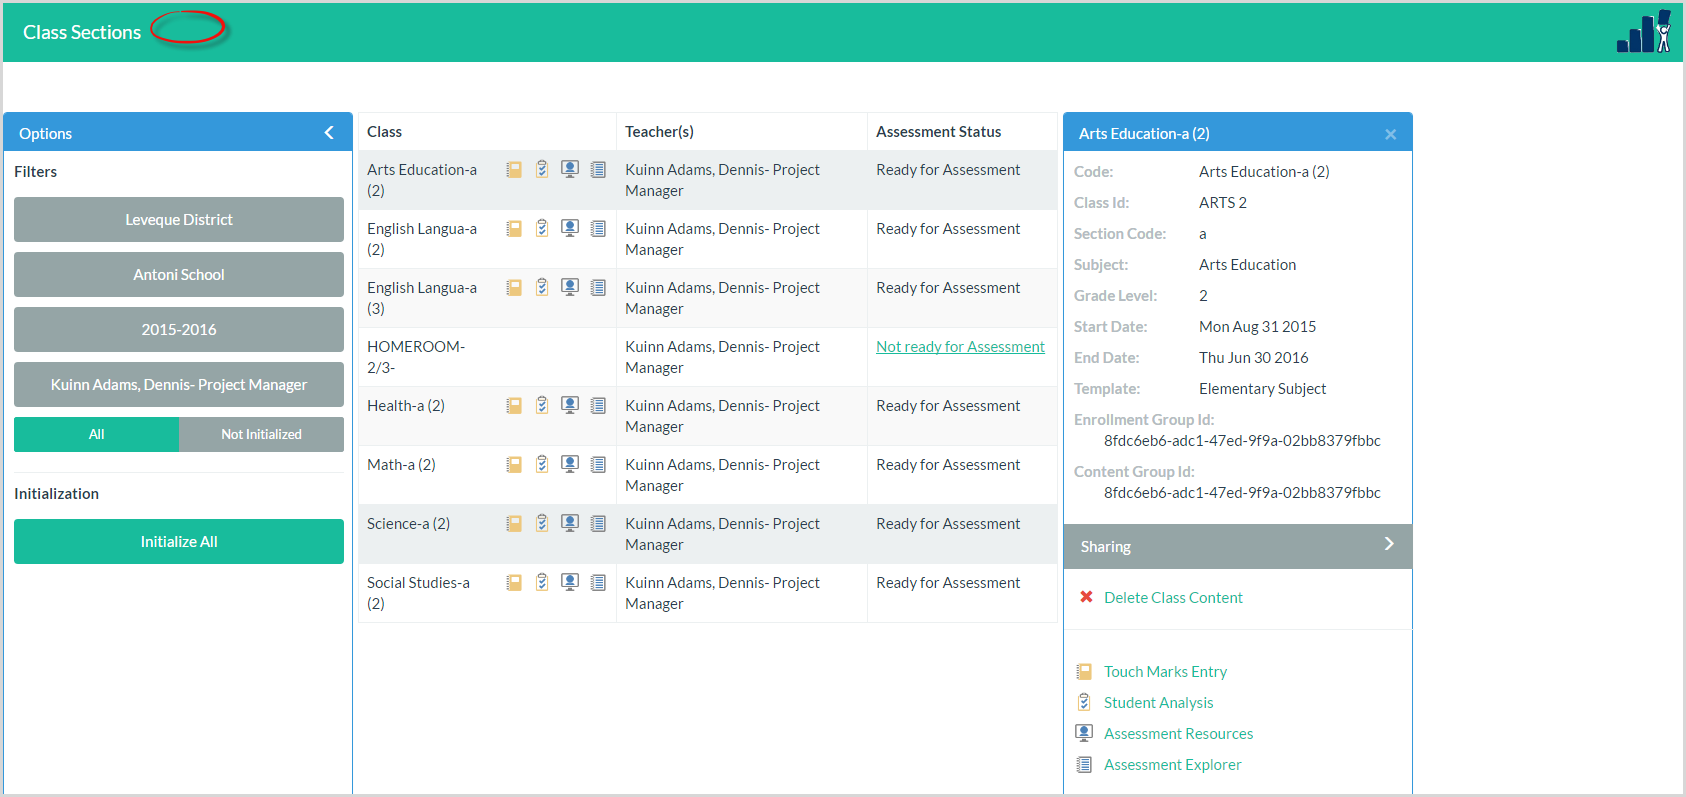
Left Side - Options Panel
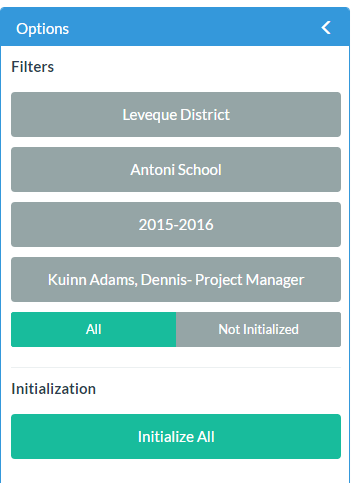
From this panel you can choose to use the filters by:
School Board/District
School
Track
Teacher
Class
You can choose to display All Class Sections or only those Not Initialized.
Click Initialize All to initialize all class sections.
Middle - Class Section Grid
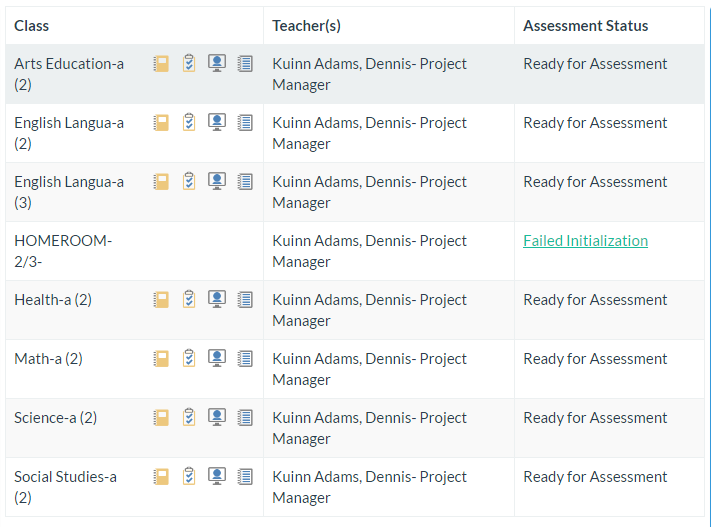
In the middle grid, you'll find your Class Sections listed, based on the filter options on the left.
In the middle grid, you'll find your Class Sections listed, based on the filter options on your left.
In the middle grid, you'll find your Class Sections listed, based on the filter options on your left.
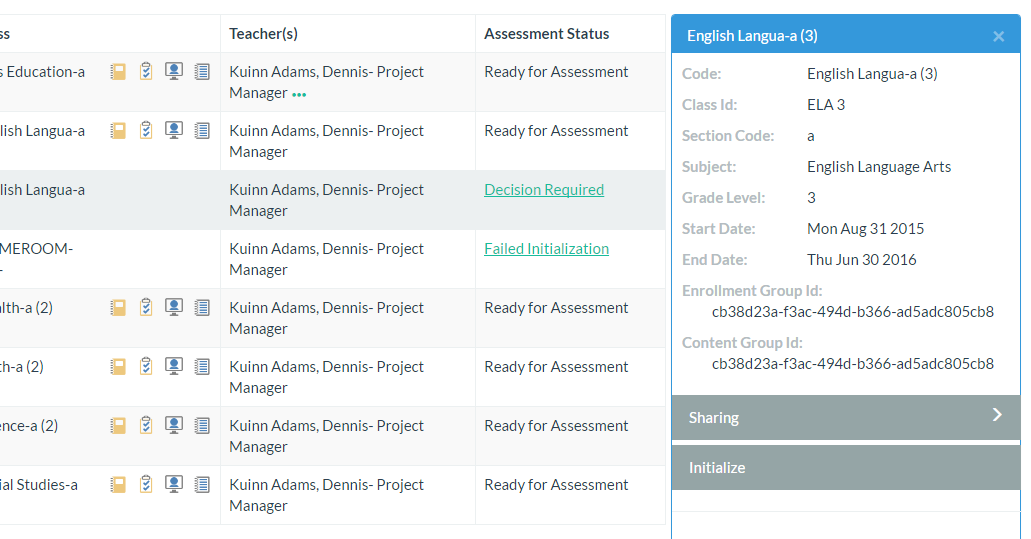
Class Column includes Class Section Name as well as icons to take you to the corresponding page, once the Class Section has successfully initialized. These will not display if the Class is not ready for assessments.
Teacher(s) Column displays the owning/managing Teachers for the Class. If more than one Teacher is in the list you will see the ellipsis (...) which you can click on to show the other Teachers' names.
Assessment Status Column displays the status of your Class Section initialization It will display one of the following;
Not Ready for Assessment - Class has not been initialized
Ready for Assessment - Class is successfully initialized and can be used for marks entry.
Failed Initialization - An error occurred, click the Class Section, Click Initialize to see the error.
Decision Required - User input is required, click the Class Section, Click Initialize to see which steps are required.
Right Side - Details Panel
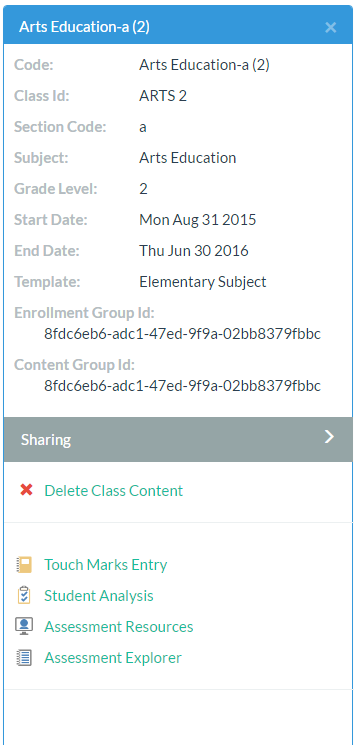
This panel contains the top portion displaying the information about the Class Section as shown in the screenshot above.
The Enrollment Group Id and Content Group Id only display if you are an Administrator.
To share the Class Section with another Teacher, Click Sharing to move to the next panel. See below for details.
To remove all attached information to the Class Section in order to re-initialize, Click Delete Class Content.
At the bottom of the panel are quick links to other modules. These will take you directly to the Class Section you are looking at.
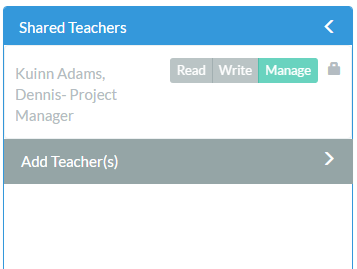
Sharing a Class Section
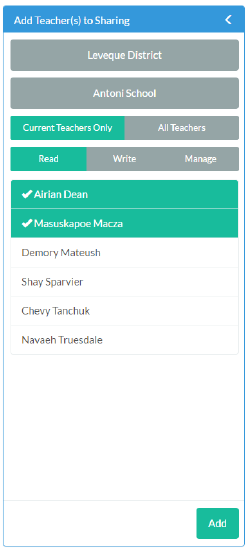
As noted above, to Share, Click Sharing. You will be taken to the following screen, showing the Teachers who the Class Section has been shared with.
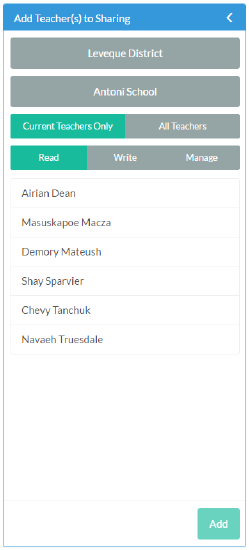
Click Add Teachers to add more shares. You may select one or multiple Teachers, then select the level of permission from Read, Write, Manage.
Read allows the Teacher to view the Class Section and Assessments
Write allows the Teacher to edit the Class Section and Assessments
Manage allows the Teacher the ability to initialize/clear, and the ability to share the class/adjust share permissions -- depending on the SIS you are integrated with, this may be pulled in from integration
If the Teacher you're looking for is not present, you may need to switch to All Teachers. Current Teachers Only mode is restricted to Teachers currently associated with a Class Section within the current school year. This may not include, for example, Support Teachers who have not yet been explicitly attached to a Section
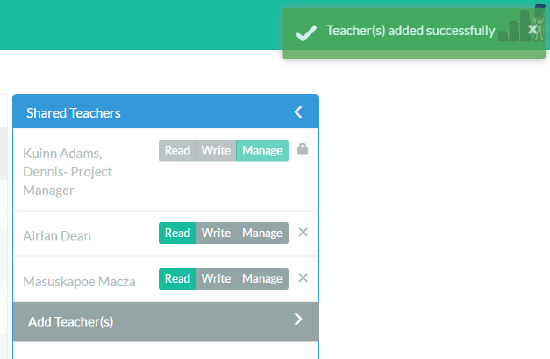
Click Add to return to the beginning. You will be notified with the green success box in the top right corner.
Step 1: Step 2: Step 3: Step 4:
Initializing a Class Section
The most significant enhancement in this section is the new ability to Initialize All class sections at one time. Click Initialize All on the left panel and all Classes will attempt initialization.
In some cases, if the Class cannot be initialized, you'll see:
Failed Initialization -- Contact your administrator to correct the problem. You can view the error message by clicking the cell and then Click Initialize in the right-side panel.
Decision Required -- Your configuration needs a grade level or template. These Class Sections must be initialized individually. Highlight the Class Section cell, Click Initialize, using the right-side panel.
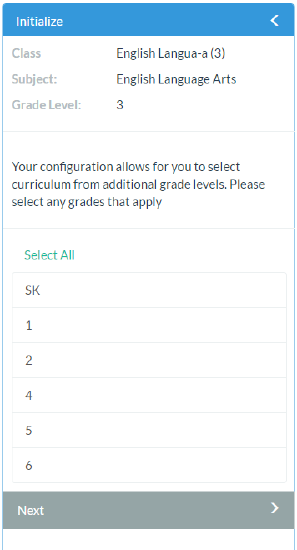
In the Initialize Panel, you are now presented with your choices. Within this screen you can:
Click Select All to highlight and choose all items in the list.
Click on one cell to select.
If settings allow it, clicking on additional cells will add them to the selection.
If settings allow it, you may continue without selecting anything. The Next button will be disabled if this option is not available
Currently, you may be asked to choose:
Template to import
Additional Grade Levels (for multi-grade classes
Which subset of strands to import
Once you have selected the Grade Level, Click Next and the class will complete initialization.