Class Synchronization
Introduction
This document describes how to synchronize two or more classes that are not currently synchronized and how to removed synchronization on existing class sections.
We suggest you synchronize your classes at the beginning of the school year or semester before you do your setup.
Description of Class Synchronization
Class synchronization allows folders, weighting and assignments to be synchronized across two or more class sections. When an item, could be a folder, assignment, lesson plan or rubric, is created or edited, the changes will automatically copy across all synchronized class sections.
Synchronization will not affect individual student due date or marks.
Automated class synchronization may be enabled by default for your classes.
Automatic synchronization will occur when the class sections are taught by the same teacher, have the same course type and the same start and end date.
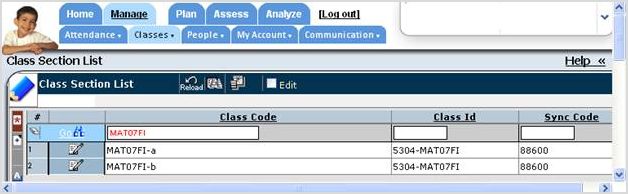
You can determine if your classes are synchronized by going to Manage > Classes > Class Sections within StudentsAchieve.
You may need to add an additional field or column to your screen by clicking the circled icon below, selecting the Sync Code column and clicking Apply Changes.
![]()

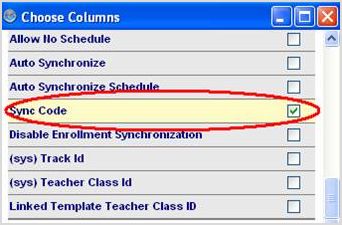
If the Sync Code is identical then the classes are synchronized. If the code differs then they are not. The screen shot above has the classes synchronized.
How to Synchronize Two or More Classes
As mentioned, classes are synchronized based on the Sync Code. You can manually set the sync codes to match to enable synchronization.
Important - The sync codes are globally generated; please choose one of the existing codes to re-use. Do not create your own sync codes.
For example: MAT7FAP-A’s Sync Code is 449800, we edit the class section to use the other 2 classes’ sync code of 88600.
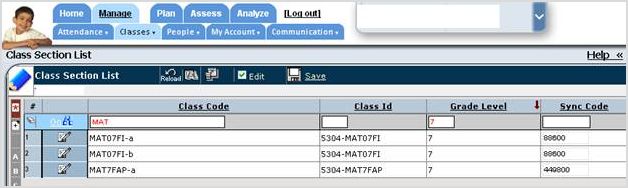
![]()
Please Note: Existing course folders and assignments will not be synchronized, only new data entered once synchronization is turned on will get pushed to classes with the common Sync Code. Please do not attempt to turn on synchronization part way through the year or semester. It will NOT have the desired effect.
How to Remove Class Synchronization
As mentioned above the synchronization of two class sections is based on the
Sync Code of each class section. Simply making these codes different will break class synchronization.
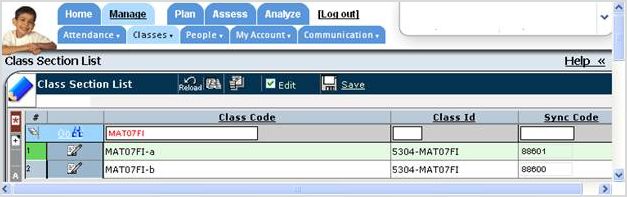
Important: These codes are system generated and as such you should not randomly select a code to break synchronization. All the system generated sync codes end with a 0. To remove synchronization; please change the trailing number (last digit) of the existing sync code.
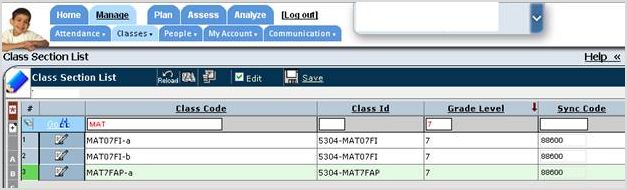
For example, below the synch code is 88600. To change the synchronization, click Edit; adjust the code’s last digit; and click Save.
If you had three classes for which you wanted to remove synchronization the Sync Codes would be changed to be 88600, 88601 and 88602
Please Note: Any items created while the classes were synchronized will continue to be synchronized. If you are turning off synchronization after having built content you may be unable to delete the content or potentially could delete the content in all classes.
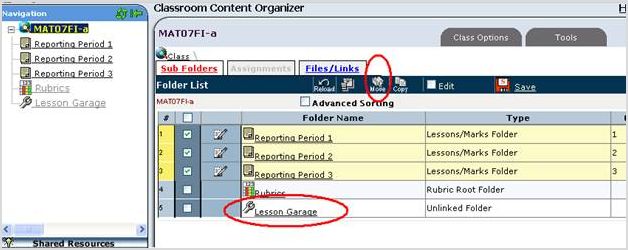
If you no longer want the content from a class that was created while synchronized, please move it to the lesson garage. This will remove the content from your active gradebook. It will no longer count towards the student’s average/level and will not appear on the parent/student portal.