Ontario Gradebook
Using the Gradebook through Marks Entry
1. Choose your class from your class section picklist.
2. From the shortcuts menu, select Input Classroom Marks.
Marks Entry Features
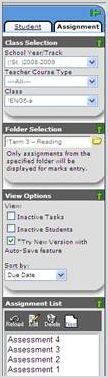
On the left panel, you can switch between entering marks by assignment or by student. You also have different selection options.
The green arrows allow you to expand and collapse the left panel and the selection options boxes.
Class Selection - You can change to another class from the Class picklist.
Folder Selection – You can select a default folder to put your tasks in.
View Options – You can show and hide inactive tasks and students as well as sort your tasks by due date or alphabetically.
Assignment List – You can edit, delete and add new tasks from the Assignment List area.
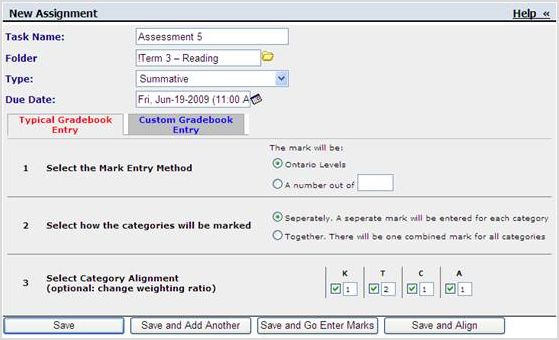
Adding a New Task
1. From the Marks Entry By Assignment screen, click New in the Assignment List area.
2. A new window will open with the New Assignment wizard, which allows you to create new assignments based on your gradebook setup.
- Enter a task name.
- Select a folder, if you didn’t in the left panel.
- Select a type of assessment; you have the choice of Summative, Formative, Diagnostic or Other.
- Select a due date from the calendar icon. It's important to use due dates so your student charting will display most-recent evaluations.
- Select if the mark will use Ontario Levels or a number "out of."
- Select how the categories will be marked.
- Align the task to one or more of your achievement chart categories and, optionally, weight them.
- Choose a save option
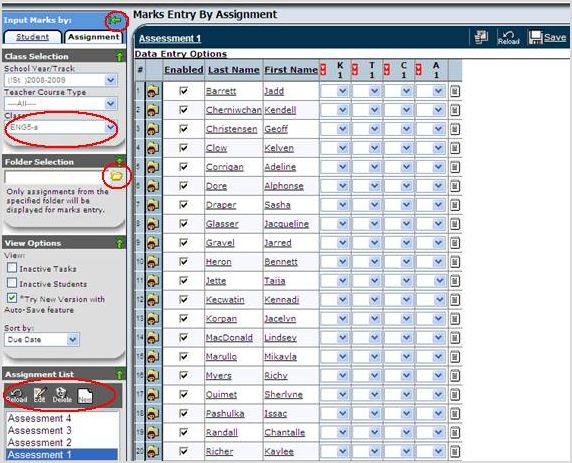
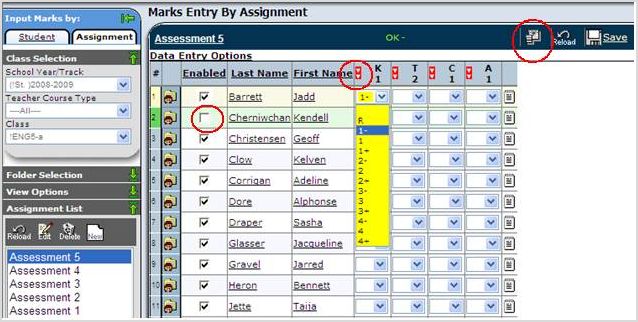
Entering Marks by Assignment
2. To enter your evaluations, you have three options:
- Use the drop-down arrow for each category.
- If you tab into a field, you can use your numeric keypad, if you type a number 1 once, you'll get 1-; type number 1 again and you'll get a 1; type number 1 one more time and you'll get a 1+.
- Use the fill-down arrows to enter a common level for all students and then change for specific students.
3. Add a comment to the notepad, if desired. Those comments can be printed onto reports, but not report cards at this time.
Key Notes
- Your picklist of Ontario Levels could be different than shown below. The Ontario Levels are set up specifically for your school board based on its assessment policies.
- After you tab off or move off a field, the system saves in the background.
- You may have different columns shown on your marks entry screens; each teacher can customize their view by using the add field/column button.
- You can turn off a task for an individual student by unchecking the Enabled box next to the student’s name. For example, this task is not enabled for Kendell Cherniwchan.
Marks Entry by Student
You can also enter or view evaluations by student. There are two screens for this – Marks Entry View and Category Summary View.
Marks Entry View
2. Choose a student, by selecting him/her from under the Student List.
3. Click the Marks Entry View, which allows you to see all assessment types. Only summative assessments will count towards a student’s mark.
4. You can enter marks, comments, and change individual due dates for a student from this view.
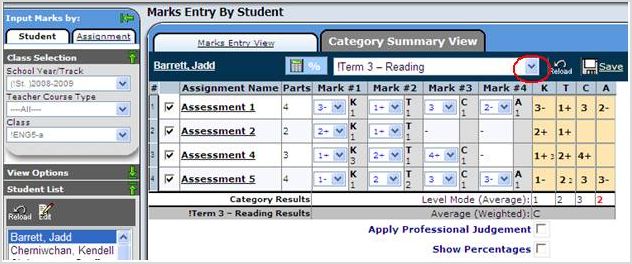
Category Summary View
The Category Summary View only displays summative assessments, as this view is used to enter your professional judgement which flows to your report card system. This could be Maplewood, Trillium or StudentsAchieve.
This example is showing the Term 3 – Reading folder/strand for a Grade 5 English class. Depending on your subject and grade, you will have different folders to choose from, which directly relate to your report cards.
The Category Summary View shows all of your summative assessments for a student and the levels or marks you’ve entered for them. At the bottom of each achievement chart category column, you'll have the most consistent level (mode) displaying in the first row (Category Results row).
The second row is the folder results; in this case Term 3 – Reading results. The Term 3 – Reading results are determined by your weighting setup that has been completed at the school board level. In this case, the result from each achievement chart category is equally weighted towards the overall folder average.
If there is more than one mode (most consistent) for an achievement chart category, the level will turn red. For example – A (Application) has two modes as there were only two summative assessments entered for this category. This is where you could use the charting options to see which task was most recent to use your professional judgement and overwrite the level if desired.
Once you have finished with a folder/strand, you should repeat the same process for other folders for that reporting period, by selecting another folder. You would do this process for each student.
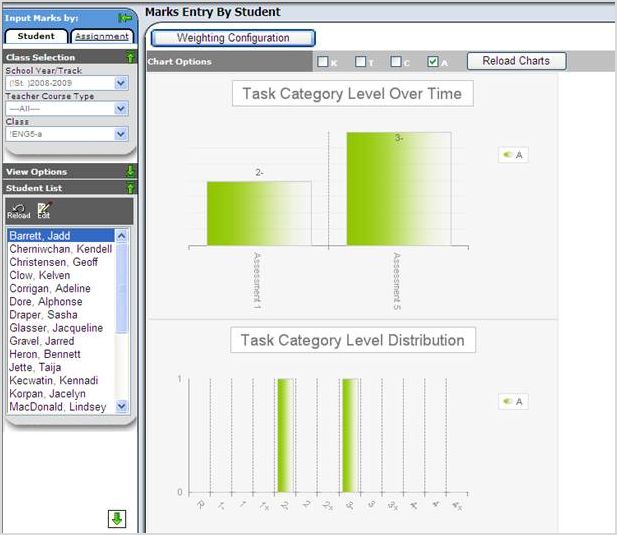
Charting Options
In the example above, we wanted to look at the Application category as there were two modes. We selected just the A box and reloaded the charts. The first chart is a Task Category Level Over Time which means its chart is based on the due dates of the tasks. It shows the most-recent on the right.
The second chart is the Task Category Level Distribution, which shows how many times the level occurred.