
Student Maintenance: Demographics
TWebSchAdmin 5.40.20 and newer
Overview
This documents Student Maintenance - Demographics, showing features in 5.40.20 and newer.
Access to the student’s data and modification options are determined by the All Students and Update flags.
If you have a role with the All Students flag is selected, you have access to all students within your school.
The Student Search panel in each page will yield the list of students meeting search criteria without additional restrictions. If the All Students flag is deselected for all your roles, the Student Search will perform the search within the set of students you have access to. (Our system keeps the list of available students for each user).
If the Update flag is not selected, you cannot modify or delete information. The Save, Add and Delete buttons on the pages will be disabled. Editable controls will be transformed to non-editable as described in corresponding sections.
Student Maintenance defaults to Demographics
You've clicked on Student Maintenance from the Landing Page or you've chosen Student > Student Maintenance from the floating menu to the right of your School District logo. Either way, Student Maintenance defaults to Demographics.
In the top, right corner there are two self-explanatory picklists to choose from: School and School Year.
At top, left, clicking the question mark takes you to Online Help.
Below that on the left, Hover Over Maintain Student. The resulting picklist allows you to choose Student:
- Demographics
- Contacts
- Enrolment
- Registration
- Programs and Classes
- Special Education
- Second Languages
- Other Programs
- Notepad
- Student Maintenance: Early Years Experience
Single-Student Search
No matter which of those you wish to investigate, it begins with Single-Student Maintenance: Student Search, which was also true in Core Trillium. Enter your Student's Surname, or a portion of it, into the Student Search box. At least one letter of the Surname or First Name is mandatory in Regular Search. Preferred name is the default for all instances of name selection. Search field is not case sensitive. Click Search to initiate your query.
To refine your Search choices, Click Advanced.
- You can search on Preferred or Legal names, or on Student ID number or OEN;
- You can filter on Student status, such Active or Pre-Registered (the defaults), and/or Inactive;
- You can filter on Gender and/or Grade;
- Clear removes anything you've entered to the Search choices and restores filter defaults;
- Subsequent searches clear the results of preceding searches.
Search Results
Click a Student's name to open their record on the right side of this page;
Within the results:
- A red cross denotes Students with a medical issue so severe that the medical peril checkbox has been set;
- A blue shield denotes Sheltered Students -- their information is hidden from everyone except the current school they're attending. While the student continues to appear on search screens, their school information will be masked.
After you've clicked a Student's name and their information is open, they may have icons visible at top, right (if you have proper security access). Hovering over the icon displays an explanation, while clicking on any of them (other than Sheltered Student) produces a pop-up providing this particular student's additional information. Icons which may appear here include:
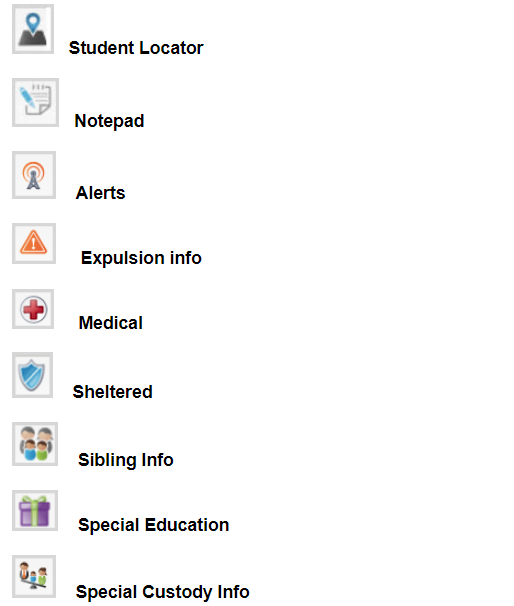
Click whichever icon(s) display(s) for a Student to learn more about him/her.
The other standard display in the top, right corner is Reports. In TWebSchAdmin, the contents of this menu vary from one module to another, always pertaining to where you are in the package. To access a picklist of -- in this case -- basic Student Reports, click the triangle to the right. Reports will generally be the same as their namesakes in Core Trillium. Our picklists will grow over time.
Personal Tab
The first time you enter Demographics and open a Student, he/she will display Personal information on the right. Click any place in the Personal horizontal bar (aka. accordion bar) to see the other six available areas of Demographic information, Medical, Addresses, Phones/Emails, Transportation, Siblings, Sacraments. Click the title bar to open the desired area of this Student's information.
Note: Whether you see all of the choices listed above and whether you can edit any of them depends upon your Security level.
On the Personal tab, the Process Student drop-down menu contains options to Change Student Number or Demit/No Show. Future updates may bring other options, but for now, keep reading for more information on the current pair.
Note: If you're working at a shared student's Home School, they must be inactivated in their Shared school(s), before you can demit them.
Change Student Number
This data window enables you to change the student's student number. Once it's changed here, it will be changed automatically throughout the system.
Field Descriptors
Student Number | Displays the current student number. |
New Student Number | The student number will be automatically generated and assigned by clicking the icon to the right of the field. |
THE STUDENT NUMBER WILL BE CHANGED FOR THE FOLLOWING SCHOOLS | |
School | The school(s) affected are listed in this field. |
Status | This student's status at each school. |
Command Buttons | |
Save | The button is visible if you have update privileges. |
Cancel | Click this button to cancel the process without saving any changes |
Demit/No Show
Enables you to enter the reasons why a student has been demitted.
An important message can appear: "This student attended your school last year but has failed to arrive this year. The records for this year will be deleted. This includes the registration and enrolment records. The student's enrolment status will be changed to inactive effective the last day of the previous school year (The year they departed)."
Field Descriptors
Effective Date | The Effective Date field is mandatory and the End Date for the student's Classes will be set to the day prior to the demit date. |
Reason | The Reason field is mandatory and the values in the picklist are maintained on the Demit Reasons validation table. Your choice determines which of the fields below appears. |
Next School | Whether this fields appears depends upon the Reason you enter. When the Next School icon (magnifying glass to the right of this field) is clicked, the Find School data window will appear. Search School or Board. When a selection has been made, the results will be displayed in School and Next School BSID. |
Post Secondary | Enabled only if the reason you select is University or College. Select the appropriate institution from the picklist, which is populated from the Organizations – Post Secondary validation table. |
Province | Enabled only of the reason you select is Other Province. Select the appropriate province from the picklist, which is maintained in the Province/State validation able. |
Country | Enabled only if the reason you select is Other Country. Select the appropriate country from the picklist, which is maintained in the Countries validation table. |
Reason for Leaving School | Select the appropriate reason from the picklist. This list is maintained in the Reason for Leaving School validation table. When "Mandatory Reason Leaving School" in the preference window is on, this field is mandatory. |
Teacher Notices | Select this box if teachers are to be notified of student timetable changes. These timetable changes will be added to the staff Add/Delete Notices report. |
Remark | Enter any comments about the student`s departure. |
Command Buttons | |
Demit | All mandatory fields must be populated. All validations must be correct. |
Demographic Information
- Information on the personal bar includes basic demographic information such as legal and preferred names. Personal information including gender, birth date, and the verification document provided at the school to verify the student`s age. Identification information includes student number, OEN, Ministry number and person ID.
- This bar is controlled by a separate security task. You must be assigned this task in order to have access to this bar.
- The personal bar adheres to the "Update Flag" setting of the security task controlling this bar. You must have this flag set ON to be able to save changes on this bar.
- The OEN field is also controlled by 2 tasks. Based on your permissions you might be able to only enter a new OEN, to only modify an existing OEN or to have full or no access to the field. The student's nine-digit Ontario Education Number appears here. If a duplicate OEN is entered you will be prompted to select another number. This field is not mandatory and may remain blank. A checkbox appears beside the OEN field to indicate whether the OEN has been entered or updated manually (selected). If there is an OEN and the checkbox is not selected, the OEN was updated via transmission file update.
- The Person ID field is controlled by its own security task. It is only visible if you have been assigned this task.
- Select the Adult checkbox if this student is an adult (i.e., past their 18th birthday). This field can also be used when a mature student does not want to provide their date of birth. Since Birth Date is a mandatory field, you can enter a fictitious date to ensure that it is accepted by the system.
Special Custody
In the student's Personal tab, below their basic information, is Special Custody Information. This section is intended to define situations where custody is specific to the student. The Special Custody and Family Composition picklists contain values defined in the validation tables of the same names. The Removed from Parental Control and Sheltered Student checkboxes further identify students who may require additional protection.
- Choosing the Sheltered Student checkbox assigns the blue shield, as shown above. That is a separate issue from Special Custody. More information on Sheltered Students is here.
- Assigning any value in the Special Custody picklist assigns the Special Custody icon, as shown above. The contents of this picklist are created here: Student Maintenance > Validation Tables, by users with proper security.
- The Special Custody icon produces a pop-up of information pertinent to the individual student. This pop-up has its own security task, intended to be assigned to only those users who require access to this sensitive information. The popup is read-only.
- The Special Custody Comment field has a maximum capacity of 2,000 characters and this comment is also displayed on the pop-up.
- If you have defined various family situations in Core Trillium, assign them using the Family Composition picklist.
- There is a checkbox to record whether this Student has been removed from their parent(s) and a free-form box at the bottom of the section, into which you can enter a special custody comment. All of this info can also be displayed from the Special Custody icon.
Citizenship and Language
- Below Special Custody is the Citizenship tab, which includes some basic details, including Aboriginal information, formerly displayed on the Personal 2 tab in Core Trillium.
- Birth Country is mandatory and defaults to Canada.
- Selecting Canada as the Birth Country makes Status in Canada mandatory.
- The bottom table is Language, providing information about students' first language, home language and a free-form field for you to enter remarks.
If applicable, your installation will have this section at the bottom of the accordion list of Demographic areas for each Student. The various picklists are managed through Core Trillium.
Enter dates and details as needed.
For Boards that have defined themselves as having Native students by checking the 'Display Aboriginal Student' field in Preferences will have the additional fields Aboriginal Student and First Nations Band. If the Preference 'Display Status Card No' is checked the field Aboriginal Status Card No is displayed.
- For French-language School Boards the fields Impact social, Admis par le comitè, Autre (spécifier), and Admis le are available. The values in Impact social are Blank, Camp de réfugiés, Pays de guerre, and Autre (spécifier).
- The values in the Student Success picklist are from the Student Success Indicator validation table. When a value is selected here it will also be displayed on the Selected Student header.
- Select the First entered Ontario Secondary Schools after Grade 9 box to identify whether the student completed Grade 9 outside of Ontario. When checked it indicated that the Cohort proxy can never apply to this student.
For English language School Boards the field FRC Student is displayed providing the user has the Preference 'Use ESL Tracker' is selected.
Be sure to Click Save to save your edits to your database.
Language Information
This section is intended to add and delete languages the student speaks. Fields for First Language, Spoken at Home and Main Language at Home as well as a Remark field are available. The values in the Language Name picklist are from the Language validation table.