
Everything you need to know about what response follow-ups are, how to set them up, how to edit them, and how to manage them.
What are response follow-ups?
Response follow-ups are an easy way to set up automatic reminders attached to responses a form collects. When a follow-up is due, a reminder email will be sent to the form owner as well as any additional contacts the form owner deems necessary.
Note: Response Follow-Ups are an add-on feature. If you'd like to have Response Follow-Ups enabled on your account, reach out to your Customer Success representative via email or via chat when logged in.
What can I use response follow-ups for?
Response follow-ups can be used for almost anything, but their primary use is to track and manage behavioral threats encountered at your school or district. Record an incident and automatically be reminded in set amount of time to follow up on that incident.
Some other uses for response follow-ups:
-
Behavioral threat tracking
-
Well-being tracking
-
Program feedback follow-ups
-
And much more
Adding a response follow-up to a new or existing form
-
Start a new form or when viewing a published form, click Actions and then Edit Form.
-
Scroll down the Form Builder page to the Response Checklist section and click on the plus icon to enable checklists for the form.

Response checklists -
Click on the Add a Response Checklist Item button and choose Response Follow-Up.
-

Add a Response Checklist Item button -
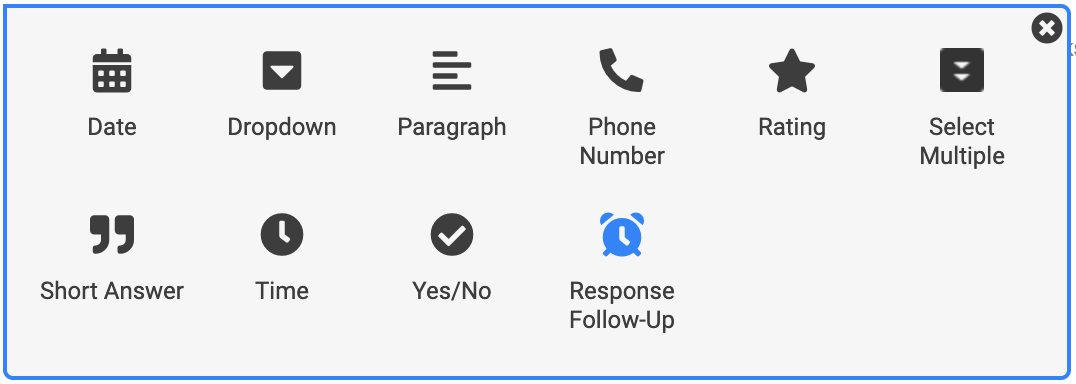
Response Follow-up
-
-
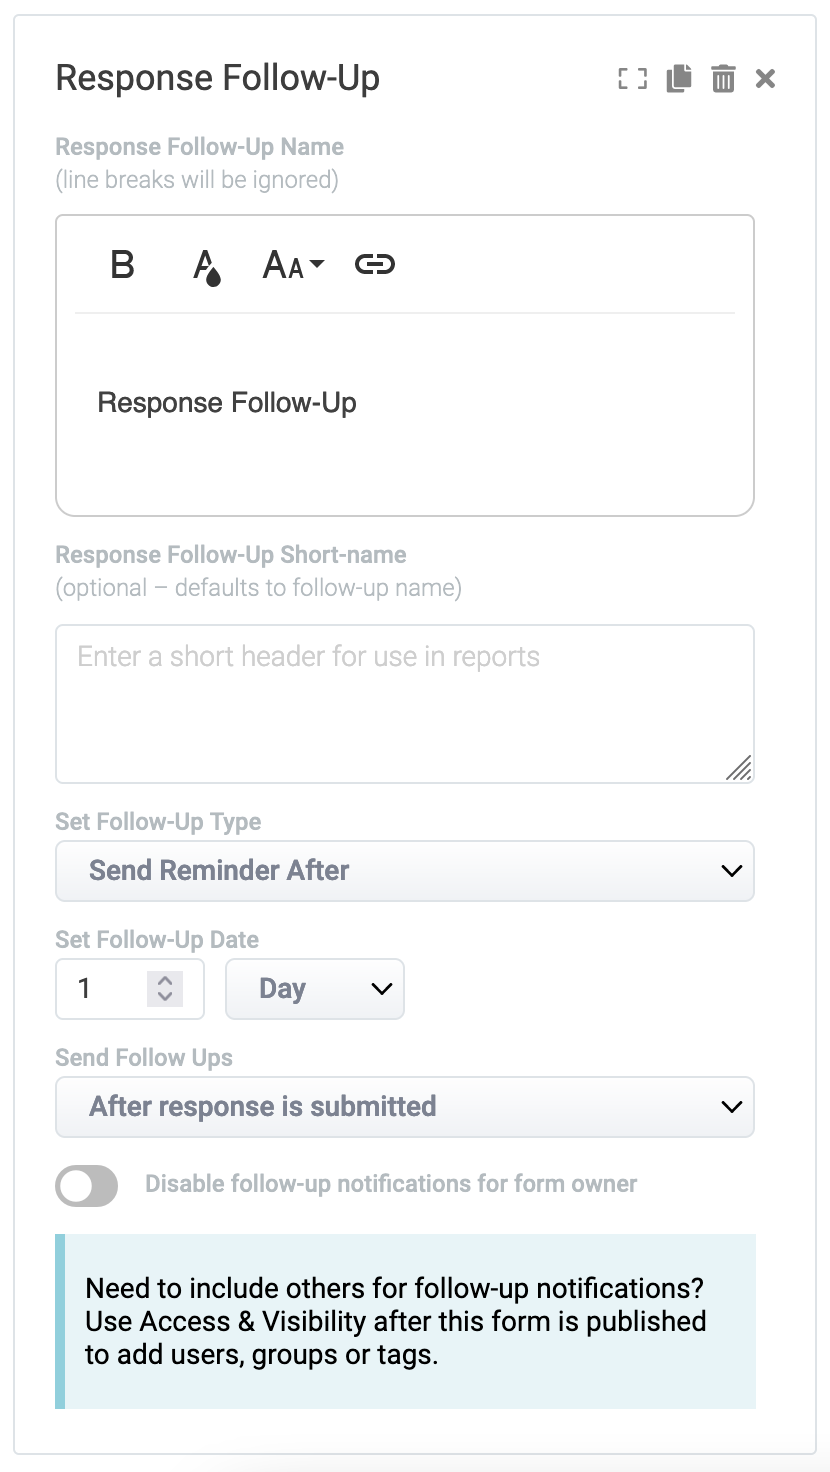
After the Response Follow-Up has been added, you will see the follow-up's settings open in the left-hand drawer.
-
Response Follow-Up Name
Use this field to give your follow-up a friendly name. This is helpful if you are adding multiple follow-ups to a form. -
Response Follow-Up Short-name
Use this field to set a short version of your friendly name that will be used in reporting and report exports. -
Set Follow-Up Type
You have three options available to you for setting a follow-up time.-
Send Reminder After
This option will let you specify a number of days, weeks, or months to wait before sending you a notification reminder. This is based either on when the response was submitted or when a response has been rostered. -
Send Reminder On Date
This option will let you specify a static date to send out the notification reminders. Use the date field to specify the date you'd like to receive the reminder notifications. -
Set Date Manually
This option will not automatically set a date when a response is submitted or rostered. You will be able to go into the Form Manager and set a date specific to each response.
-
Editing a response follow-up
To edit a response follow-up, just start a new version of your form by going into the Form Manager and then clicking the Actions menu and then Edit Form. Scroll down the Form Builder page to the Response Checklist section and click on the follow-up you'd like to edit.
You have two options available to you based on your organization's processes, to keep existing follow-up information that's been collected so far, add a new response follow-up to your form using the instructions found earlier in this page. If you don't need to keep earlier follow-up information, you can delete the previous follow-up once you've added the new one.
Once you're done with your changes, you can either click the Save & Exit button at the top of the page if you don't want to publish your changes. Otherwise, click the Publish button at the top of the page. Reminder that if there is an approval workflow attached to the template that you're using, your form will need to be approved before the changes will be made live.
Removing a response follow-up from a form
If you'd like to remove a response follow-up from a form, start a new edit of your form and in the Form Builder, scroll to the Response Checklist section and click the trash bin icon beside the follow-up you'd like to remove.

When finished, you can click the Save & Exit button to save your changes to publish later or click the Publish button to publish your change. Again, any approval workflows will need to be processed before your changes will be made live.
Caution: Like other Response Checklist items, once a follow-up has been deleted, it will no longer be available to the form including the Form Manager.
Managing response follow-ups
As your form collects responses, you will be able to use the Form Manager to view and manage your response follow-ups in the same area as your other Response Checklist items.
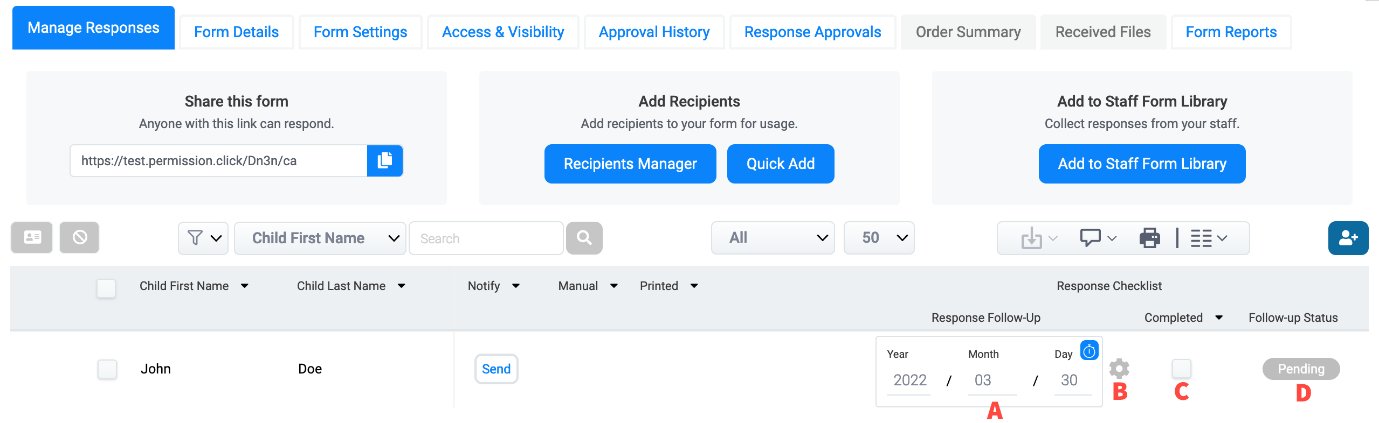
On each response you will see the following:
-
The date set for the follow-up reminder specific to that response. When a date has been manually set, you will see the blue clock icon displayed beside the date.
-
An options menu that will allow you to either reset the follow-up date in the event you've set a manual date, but would like to revert back to the automatically set date as well as allowing you to disable the follow-up for that response.
-
A completion checkbox to help you keep track of those follow-ups that you have completed.
-
A follow-up status that will help you to see at-a-glance which follow-ups are not ready/needing a date set (Not Ready), pending (Pending), which have been triggered and notifications sent (Sent), which that have past their date and are overdue (Overdue), and which have been completed (Complete).